TI-99/4A FAQ: BBS’s

TI BBS’s

  • 9640 News BBS  (currently offline)
    • URL: 9640news.ddns.net
    • PORT:9640/9918?
    • SOFTWARE:Mystic
    • PLATFORM: ??
  •  Heatwave BBS
    • URL:heatwave.ddns.net
    • PORT:9640
    • SOFTWARE:S&T BBS
    • PLATFORM: Geneve
  • My TBox (german)
    • URL: MyTBox99.ddns.net
    • PORT:61643
    • SOFTWARE: After Hours BBS
    • PLATFORM: TI-99/4A
  • The KEEP BBS
    • PHONE: 503 852-3170
    • URL: thekeep.net
    • PORT:23
    • SOFTWARE:Worldgroup
    • PLATFORM: PC
    • NOTES: multi-user chat, gaming, many file areas for retro machines, dialout to other BBS”s using my modem with /GO DIALOUT on the BBS
  • The KEEP BBS After Hours
    • URL:thekeep.net
    • PORT:9918
    • SOFTWARE: After Hours BBS
    • PLATFORM: TI-99/4a
  • The Hidden Reef
    • PHONE: 718 448-9402
    • SOFTWARE: S&T BBS
    • PLATFORM: TI-99/4A
  • FuSiON BBS
    • URL: fusionbbs.ddns.net
    • PORT:9640
    • SOFTWARE:Mystic
    • PLATFORM: Raspberry PI

TI-99/4A FAQ: Development Resources

mirror of https://atariage.com/forums/topic/153704-ti-994a-development-resources/

Don’t forget to visit Ninerpedia; our wiki about the TI-99/4A. Check here.


If you are the owner of one of the programs or sites and do not want it posted, please let me know and it will be removed immediately.

Also if you think a reference to an important development resource is missing, then please let me know and I’ll be happy to add to the list.


If you are new to the TI-99/4A or returning after a long time, then you might want to check out the TI-FAQ page here.

Also make sure to visit the TI-99/4A Home Computer Book Archive by @airernie, now hosted by @acadiel.

It’s a great collection of excellent technical books about programming the TI-99/4A.


Latest update: May 5th 2019


1. Emulators


classic99 win

Windows-based emulator including TI-99 ROMs under license from Texas Instruments.

Debugger, memory heatmap, OS file support, support for 128K bank-switch carts, can create ROM/GROM cartridges, possibility to record AVI movies.

User manual is included.

Check the classic99 Updates thead for the latest news on classic99.

Click here to watch Tursi’s classic99 tips and tricks video tutorial.

(Author: @Tursi)


MAME win+linux

Multiple system emulator that supports the TI-99/4, TI-99/4A, TI-99/8, and Geneve.

Emulates more than 400 systems. Requires ROMs from the original systems.

Features a powerful Debugger, most accurate emulation, support for 64K bank-switch carts / Gram Kracker / UCSD p-code expansion card.

Possibility to record AVI movies.

Also see the MAME section in ninerpedia.

(Author: @mizapf)


Js99’er All major browsers

TI-99/4A emulator written in javascript. Has support for TMS9918A VDP & supports most of the F18A functionality, TMS9919 sound.

Virtual disk drives using google drive.

Some preloaded games, demos and applications included.

Js99’er development thread on Atariage can be found here.

Js99’er source code repository on Github can be found here.

(Author: @Asmusr)


V9t9 win+linux

TI-99/4A emulator written in java. Has support for TMS9918A VDP, TMS9919 sound & TMS5220 speech.

Debugger included. V9t9 also supports the UCSD P-Code system.

Some of the advanced V9t9 features include: ability to save/restore emulator state, record & playback, support for V9938 VDP.

Requires ROMs from the original systems.

This emulator needs the Java Runtime Environment available for free at Oracle.

V9t9 discussion thread can be found here.

(Author: @eswartz)


Win994a win

Windows-based emulator of the TI-99/4a

Good TMS9900 cross-assembler included. No debugger.


Ti994w win

Windows based emulator. Offers 80 column support, SAMS card 1Mb of RAM, V9938 support, built-in debugger, …

(Author: @F.G. Kaal)


TI-99/Sim linux

Linux-based software simulation of the TI-99/4A.


PC99 DOS

Commercial DOS-based emulator licensed by Texas Instruments to sell ROMs.


2. Programming languages


Assembly language – Software

Winasm99 win

Windows based TMS9900 cross assembler with GUI and ability to build 8K cartridge roms.

Is part of the Win994a emulator.


asm990 linux

Linux based cross Assembler for the TI 990 by Dave Pitts.

You’ll also need lnk990 a separate linker which can be found on the same page.


TIasm win

TMS9900 cross assembler TIasm will build 8K console (>0000) or cartridge (>6000) rom.

Is part of the old V9T9 emulator package. Source is included.


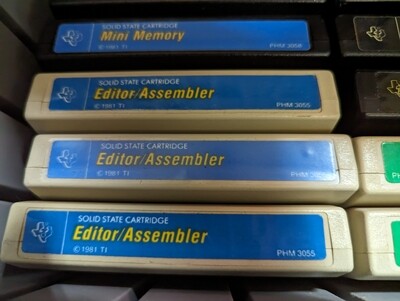
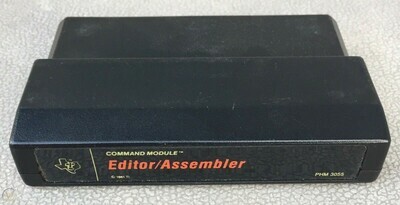
Editor/Assembler IV TI-99/4A

Editor/Assembler IV is a module for the TI99/4A home computer. The software this cartridge contains is the in TMS9900 assembler rewritten Editor and Assembler loader, Program loader and an implementation of

my own written Linking Loader and a simple debugger. The editor and debugger are running completely in the module space (>6000 – >7FFF). The assembler is copied from EPROM to CPU RAM before it is started.

(Author: @F.G. Kaal)


XA99 – Cross Assembler 99 win

XA99 (Cross Assembler 99) is a program for assembling TMS9900 assembler code on the PC.

(Author: @F.G. Kaal)


L99 – Linker 99 win

L99 is a tagged object file linker by Fred Kaal for creating program files for the TI99 and Geneve home computer.

(Author: @F.G. Kaal)


xdt99 – TI 99 Cross-Development Tools win, linux, OS X

The TI 99 Cross-Development Tools (xdt99) are a small suite of programs that facilitate the development of programs for the TI 99 family of home computers on modern computer systems.

All programs are written in Python and thus run on any platform that Python supports, including Linux, Windows, and Mac OS X.

Includes xas99 (TMS9900 cross-assembler), xga99 (GPL cross-assembler!) and some command line tools for handling disk images and nanoPEB/CF7A+ volumes.

The development thread on atariage can be found here.

(Author: @ralphb)


Assembly language – Manuals


devres_bookcovers_kombi2.png

Editor/Assembler reference manual PDF

The official Editor/Assembler reference manual. Note that this is not a tutorial for beginners.

Still, it’s an essential manual when writing assembler for the TI-99/4A.

The online version can be found here.


COMPUTE!’s beginner’s guide to assembly language on the TI-99/4A PDF

The Lottrup book. The only manual available today focusing on programming games in TMS9900 assembler.

The examples in the book are for the Mini Memory line-by-line assembler which is rather limited.

The manual also contains a few errors. Check here for the corrections.

Nonetheless this book is a must-read for everyone seriously interested in writing assembler games for the TI-99/4A.

The online version can be found here.


Introduction to Assembly Language for the TI Home Computer PDF

The Molesworth assembly language introduction book.

Covers VDP communication, keyboard reading, file access and a lot more.


The Art of Assembly series PDF

The full series of articles by the late Bruce Harrison compiled as PDF. Over 600 pages, very well written and thorough.


Assembly on the 99/4A WEB

Excellent thread on Assembly language programming for the TI-99/4A, focussing on game loops, etc.

(Author: @matthew180)


SPECTRA2 zip

Library for programming games in TMS9900 assembly language.

Has routines for handling tiles, sprites, sound & task scheduler.

Documentation manual PDF is included.

(Author: @retroclouds)


BASIC – Software

Power BASIC TI-99/4A

This is a port of the ‘Power BASIC’ interpreter used with the TMS9995-based Powertran Cortex machine.

It is written in pure assembly. Graphic commands, sprites and saving to disk are supported. Currently no sound and speech supported.

Power BASIC instruction manual available.


Playground TI-99/4A

Playground is a package making it possible to create assembly language programs that run from TI BASIC on an unexpanded console using only a cassette player to load the program(!)

Although primarily intended for use in TI BASIC, programs written for playground can be run from XB, saved in E/A 5 format, loaded into a supercart, and even made into an actual cartridge.

The manual describes in detail the differences in style necessary when programming for an environment that runs in only 256 bytes of memory.

There is a library of subroutines for printing text, printing a number, shifting blocks in VDP, generating random numbers, using the line editor from BASIC, HCHAR, VCHAR,GPLLNK, a bit reversal routine, and a fast scroll routine.

Source code is included for three different programs that should help you get started.

Check here for the development thread on Atariage.

Check this related thread for some clever work based on Playground.

(Author: @senior_falcon)


Extended BASIC – Software

Extended Basic Game Developers Package “ISABELLA” TI-99/4A

This package has been extensively updated to be faster, more versatile, and much simpler to use.

It consists of two applications that make it possible to produce arcade quality games with XB.

Although they are designed to complement each other, each is a stand alone utility.


This is meant to be used with the Classic99 emulator, but the resulting programs are fully compatible with a real TI99 with nothing more than XB, 32K and a disk drive.


Note that the included XBGDP package has an option to use the older TI BASIC only runtime routines if desired.

It replaces for the older “Harry Wilhelm’s BASIC COMPILER” and as a bonus, it’s much easier and faster to use.

(Author: @senior_falcon)


1) XB256

XB256 lets you toggle between two independent screens as desired. Screen2 lets you define all 256 characters and have up to 28 double sized sprites using the character definitions available to Screen1. Scrolling routines let you scroll characters left, right, up, or down or scroll using single pixels.

There is a text crawl that gives an effect similar to the STAR WARS title screen. You can highlight text, set the sprite early clock, print in any direction on the screen using 32 columns, read/write to VDP ram, write compressed strings or sound tables to VDP ram, play a sound list, and catalog a disk.


A utility lets you save selected areas of VDP memory as compressed strings that cn be merged with your program. With this, character definitions, sound tables, screen images, etc. can be saved in a more compact form that can be loaded virtually instantaneously, even in XB

There are two utilities that convert the CALL SOUNDs in an XB program into a sound table containing music and sound effects. Sound tables can be loaded directly into VDP memory and played automatically while your XB program does other things. Also, a second player can play a different sound list simultaneously with the first, so you can have backgroundmusic playing and add sound effects on top of the background music.


2) XB COMPILER

COMPILER lets you compile an XB program into an equivalent assembly language program that will run about 30 times faster. All the XB256 subprograms are supported by the compiler and in general, all the major features of XB are supported, including XB style IF/THEN/ELSE and named subprograms. About the only XB features that are not supported are DEF and the trig functions.


T80XB TI-99/4A

T80XB is a collection of assembly language subroutines that give the Extended BASIC programmer easy access to the 80 column screen mode offered by the F18A and other 80 column upgrades.

Lets you select from two independent screens. G32 is the default screen when a program starts running.. This is the 32 column graphics mode screen normally used by Extended BASIC. It is accessed using the usual XB graphics statements. T80 is the 80 column text screen which offers 24 rows of 80 columns.. You can toggle between the two screens as desired, preserving the graphics on each screen. When using the T80 screen there are assembly equivalents that replace PRINT, CLEAR, COLOR, INPUT, CHAR, HCHAR, VCHAR plus routines that will scroll the screen and invert text on the screen.

(Author: @senior_falcon)


RXB 2015E TI-99/4A

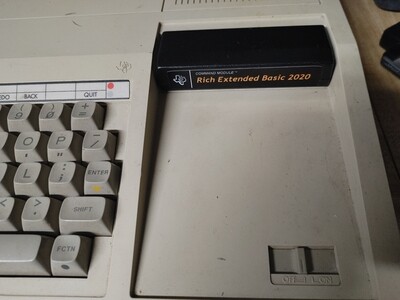
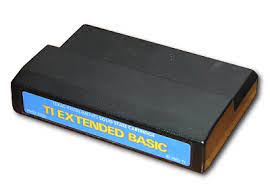
RXB 2015E is an updated version of TI Extended Basic.

Most bugs in XB have been fixed in RXB and GKXB is in the main core of RXB.

RXB has features no other XB has such as Batch processing or Hard Drive Access or updated CALL routines.


The below RXB tutorials on Youtube give a good overview of RXB’s power:

RXB DEMO 1 video

RXB DEMO 2 video

RXB DEMO 3 video

RXB DEMO 4 video

RXB DEMO 5 video

RXB DEMO 6 video

RXB DEMO 7 video

RXB DEMO 8 video

RXB DEMO 9 video

RXB DEMO A video

RXB DEMO B video

RXB DEMO C video


Full documentation, examples and GPL source code included in the ZIP package. Cartridge image for classic99 emulator also included.

Requires a GRAM device such as a GRAM Kracker for running RXB on the TI-99/4A.

(Author: @RXB)


My Little Compiler (MLC) TI-99/4A

Library for using assembler-like language & routines from Extended Basic.

Great for putting more power in Extended Basic programs. Now includes a precompiler for high-level language syntax. Demo Pong game and documentation included.

The MLC development thread can be found here.

Check out the video by @rocky007 on his MLC based TI-99/4A port of Kaboom!

(Author: @moulinaie)


The Missing Link 2.0 (TML) TI-99/4A

The zip archive contains “The Missing Link 2.0” and its documentation. This was published by Texaments in 1990.

It gives the XB programmer easy access to the bit mapped features of the 9918 VDP.

Full color cartesian graphics, turtle graphics, sprite graphics (32 sprites with auto motion) are supported.

Text can be displayed on screen with fonts having sizes ranging from 4×6 pixels to 8×8 pixels.

The manual is updated with many previously undocumented features. A tutorial called “Potatohead” is included.

There is a loader that embeds A/L programs in high memory – they can be saved as an XB program and run directly out of high memory.

(Author: @senior_falcon)


TidBiT – BASIC/XB Translator win, linux, OS X

A translator program that reads a program written in a custom, structured form of BASIC and translates it to a BASIC / Extended BASIC program.

PHP required when doing a local installation.

Check here for the latest revision, installation instructions included.

(Author: @matthew180)


Kull KXBII Extensions TI-99/4A

Kull Extended BASIC II programming package. High resolution graphics and clock support in Extended Basic. Documentation by @hloberg.


Extended BASIC – Manuals


devres_bookcovers_kombi4.png

COMPUTE!’s Programmer’s Reference Guide to the TI-99/4A PDF

TI-Basic programming manual touching graphics and sound.


COMPUTE!’s TI Collection volume One PDF

The online version can be found here.

Best of TI-Basic programming by C. Regena


Texas Instruments TI-99/4A user reference guide PDF

The official user reference guide with details how to setup and connect your TI-99/4A.

Includes an introduction on the TI-BASIC programming language.


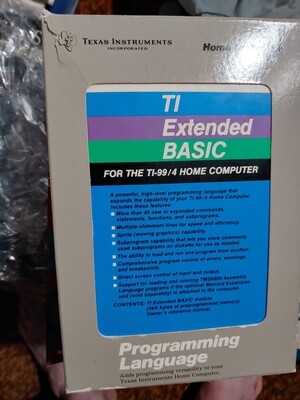
Extended Basic reference manual PDF

The official extended basic manual, explaining the 40 new or expanded commands, sprites, etc.

Check here for the online version with command lookup functionality.


MG Night Mission PDF

Advanced tutorial on how to program an arcade game in Extended Basic.


MG Smart Programming Guide for Sprites PDF

Advanced tutorial on how to efficiently use sprites in Extended Basic.


C – Software

C99 v4 TI-99/4A

C99 is a small C compiler for the TI-99/4A written by the famous C. Pulley. Documentation included.


C99C – C99 cross compiler and optimizers win

C99C is the enhanced PC version of the C99 compiler for the TI99/4A home computer.

Also included are multiple optimizers for compacting the generated assembly source (C Optimizer, Function Call Optimizer, …)

(Author: @F.G. Kaal)


GNU C Compiler (GCC) win + linux + osx

GCC for the TMS9900 allows you to cross-compile C programs on your PC (Linux, OSX or Windows) for the TI.

Insomnia’s release contains a set of patches against GCC 4.4. Just check out the code from the GCC project, apply the patches and build according to the build instructions

for your platform and you’re on your way to write programs and games for the TI in a high level language that rival the speed of assembly. And if you need just that little

bit extra in terms of speed, you can always inline TMS9900 assembly for the critical sections of your code and compile everything with the same toolchain.

For access to the VDP, the SN76489, etc… you can use Tursi’s ti99 library, which you can find in the GCC thread.

Hop over to the INSOMNIA LABS blog for background information on this port.

Check the “Setting up the GCC compiler for the TI-99/4A video by @Tursi for detailed steps on how to build and install GCC on your Windows PC.

You can now download the cygwin binary port of the older TI GCC 1.10 for Windows here. (Thanks @lucien2).

(Author: @insomnia)


Fortran – Software

99-9640 Fortran TI-99/4A & Geneve

The zip archive contains LGMA Products’ FORTRAN v4.4 in both a version for the TI-99/4A and the Geneve 9640 computer.

Documentation in PDF format included. The discussion thread on Atariage can be found here.

Special thanks to: dano

devres_cover_fortran_package.png


Forth – Software

Turboforth TI-99/4A

A brand new implementation of the Forth langugage for the TI-99/4A.

The Forth system itself is written in assembler and is optimized for speed.

It runs from the cartridge space so there’s plenty of space for your program in the 32K memory expansion.

Check TurboForth.net the companion web site for the TurboForth system.

Click here for seeing some Turboforth video tutorials.

(Author: @Willsy)


TI Forth Instruction Manual “2nd Edition 2013” PDF

2012 enhanced version of the original TI Forth Instruction Manual in PDF format by @Lee Stewart.

Look here for details on manual improvements, etc.

The updated TI-Forth system disk can be found here.

(Author: @Lee Stewart)

devres_bookcovers_kombi5.png


fbForth TI Forth with File-based Block I/O zip

fbForth uses Level 3 file I/O for I/O of Forth blocks. It also implements 80-column text mode if you have a system with that facility.

fbForth 32KB 2.0.X ROM cartridge available.

(Author: @Lee Stewart)


CAMEL99 V2 Forth TI-99/4A

Multi-tasking Forth for the TI-99/4a. CAMEL99 Forth has been built as an educational tool for those who are interested in how you could cross-compile Forth to a different CPU using an existing Forth system.

Camel99 Forth Development thread on Atariage can be found here.

(Author: @TheBF)


GPL – Manuals/Tutorials

GPL Programmers Guide PDF

The original GPL programming reference manual from Texas Instruments.

Covers all opcodes and advanced stuff like coincidence detection, I/O routines, etc.


devres_bookcovers_kombi3.png


GPL HOW 2 Series video

A complete series on how to program GPL (Graphics Progroamming Language) on the TI-99/4A.

Each tutorial has its own support package with example code, GPL assembler, etc.

Video tutorials done by Rich, the programmer of Rich Extended Basic.

(Author: @RXB)


GPLHOW2A – Introduction video / zip

GPLHOW2B – Sprite demo video / zip

GPLHOW2C – How to make a Screen Editor like TI Writer or Editor Assembler video / zip

GPLHOW2D – Editor Assembler TI BASIC support.video / zip

GPLHOW2E – DMII cartridge upgrades and how GPL works video / zip

GPLHOW2F – TI Basic to GPL. Converting a TI Basic program to GPL video / zip

GPLHOW2G – TI Basic CALL SOUND to GPL video / zip

GPLHOW2H – Simultaneous sound lists and interrupt timer in GPL video / zip

GPLHOW2I – XB2GPL demo of a XB game Baloons converted into a GPL program video / zip

GPLHOW2J – Update to GPLHOW2I and adds a automatic music to the game from the last demo video / zip

GPLHOW2K – How to make XB Program Image files into I/V 254 files video / zip


TI-Intern PDF

Details on “Monitor”, the OS of the TI-99/4A. Disassembly of console ROM/GROMS and GPL interpreter.

Has details on interrupt routine, utility subprograms, basic interpreter, etc.


The thread “The TI-99/4A Operating System” is an ongoing community project for commenting the source code of the TI-99/4A ROM and allowing it to be assembled with todays’ assemblers.


LOGO – Manuals

TI-LOGO programming manual PDF

The official TI-LOGO programming manual.

The online version can be found here.

devres_bookcovers_kombi7.png


Pascal – Software

Turbo Pasc’99 TI-99/4A

The zip archive has the patched version of Wiposofts Turbo Pasc’99 which you can run on your favorite emulator or on the TI-99/4A itself.

While Turbo Pasc’99 is not as complete an implementation of Pascal as the UCSD Pascal system, it does have the advantage of not requiring

any special hardware other than 32K RAM and a disk drive, and will likely meet the programming needs of most TIers.

Check here for an english translation of the german documentation.

This version is started by running the Editor Assembler #EA5 program image DSK1.TP99A

Special thanks to: @Vorticon, @apersson850, @retroclouds and @lucien2


Pascal – Manuals

UCSD Pascal ZIP + PDF

The official UCSD Pascal programming manuals and disks. The zip file (70 megabytes) contains all manuals in PDF format.

Here are the PDF manuals for online viewing: Compiler, Editor, Filer, Utilities, Assembler, Linker, p-code card

The UCSD system disk images in v9t9/MESS format can be found here.

Note that you need the UCSD P-code expansion card for running UCSD Pascal on the TI-99/4A.


Thierry Nouspikel has lots of information on the technical implementation of UCSD Pascal on the TI-99/4A.

Check here for details on the P-Code card and here for details on the P-Code system software.

Also a lot of details on UCSD Pascal in general (p-system vm, documentation, cross compiler, …) can be found here.

devres_bookcovers_kombi6.png


3. Technical Documentation


Hardware

bookcovers_kombi1.png


TMS9900 Microprocessor Data Manual PDF

Data Manual on the TMS9900 16-bit processor. The TMS9900 is the CPU used in the Texas Instruments TI-99/4A Home Computer.

Contains instruction execution times, opcode size, etc.


TMS9901 Programmable Systems Interface Data Manual PDF

Data Manual for the TMS9901, Interrupt and I/O interface controller


VDP Programmer’s guide PDF

The official programmer’a guide for the TMS9918A and its variants. The 9918A is the Video Display Processor

chip used in the TI-99/4A and several other home computers + game consoles of that era.


SN76489 sound chip datasheet PDF

Data sheet for the SN76489 sound generator. The TMS9919 in the TI-99/4A is close to being identical with the SN76489.


TMS5220 Speech Synthesizer Data manual PDF

Data manual for the TMS5220 chip used in the TI-99/4A speech synthesizer device.


Interface standard & Design Guide for TI 99/4A peripherals PDF

The purpose of this manual was to consolidate all information available in the public domain on the design and development of peripherals for the TI 99/4A computer into one reference. Also covers the software aspects such as DSR architecture, PABs, etc.


ROM Command Module Guide 2.0 PDF

This manual provides a complete description of how Assembly Language User Programs need to be written so that the object code can be downloaded into (EP)ROM’s which canthen be used in the “(EP)ROM module”, a module designed to be used with the TI 99/4A Home Computer.


TI Hardware Manual txt

Compilation of valuable hardware & programming info on Myarc memory cards, Disk Controllers, Hard Drives, CPU identification (TMS9900, TMS9995, TMS99000) in assembly language, etc.


DSR (Device Service Routine) / Disk & File Management

Device Service Routine Specification for the TI-99/4(A) Personal Computer PDF

Functional Specification for the 99/4 Disk Peripheral PDF

Software Specification for the 99/4 Disk Peripheral PDF

GPL Interface Specification for the 99/4 Disk Peripheral PDF

File Management Specification for the TI-99/4 Home Computer PDF

File Operations in assembly language


4. Homebrew Hardware


Graphics & Sound

F18A Video Display Processor

The F18A is a FPGA based hardware and pin compatible replacement for the TMS9918A/TMS9928/TMS9929 VDP’s (Video Display Processor).

Besides VGA output it offers enhanced functionalities such as 80-column mode, additional video resolutions, hardware register scrolling, an embedded TMS9900 compatible GPU, etc.

The development thread on Atariage, which includes the F18A programming documentation can be found here.

The store on code|hack|create has the details on F18A availability, costs, etc.

(Author: @matthew180)


SID Master 99 sound synthesizer card

The SID Master 99 is a new sound synthesizer expansion card for the Peripheral Expansion Box.

It integrates the famous MOS 6581 or 8580 SID chip (as used in the Commodore 64 home computer).

SIDPLAY99 sound player software available for use with this expansion card.

The store on DSAPC has the details on Sid Master 99 availability, costs, etc.

(Author: @marc.hull)


Homebrew cartridge boards

There are a number of Homebrew cartridge boards available to the users of the TI-99/4A now.

Each has its own advantages and disadvantages from a usability standpoint, and some earlier types are only available by having your own made.


To read the PCB layout files mentioned below, you need the ExpressPCB software which is available for free. Check here.

The files are currently not released in Gerber/Excellon format, but can be converted to it using the RobotRoom Copper Connection software, available here.

Note that to convert files to Gerber format you have to have the licensed version of the software ($50).


16K board PCB file

The first of the new cartridge boards is the 16K board designed by @acadiel and @Stuart.

This board used an inverted output from a 74LS379 to select between two 8K banks at >6000 in the TI memory map.

The banks are selected by writing to >6000. This board allows most of the third-party cartridges designed for the 99/4A to be replicated.

Further details on this board (components, EPROMS, software, etc.) can be found in: 16k_board_details.rtf


FlashROM 99 PCB file, firmware source code

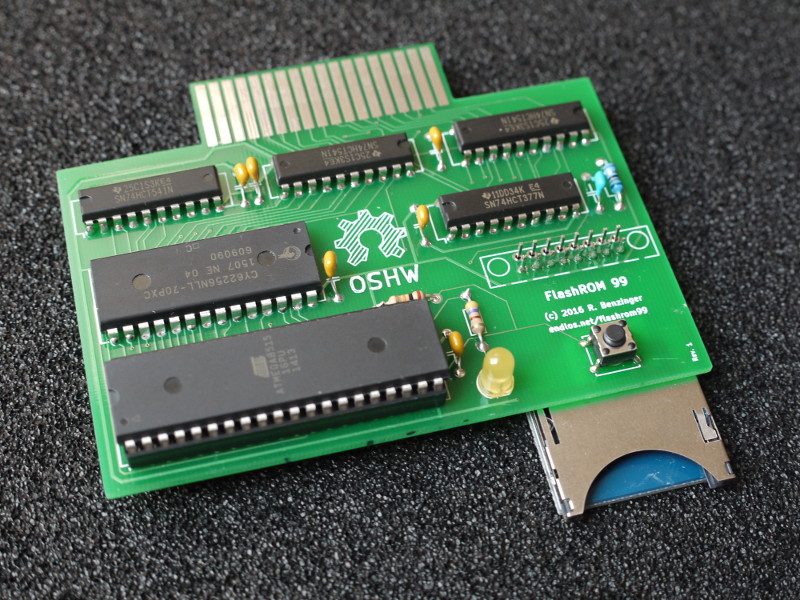
The TI 99/4A Flash ROM Cartridge, or FlashROM 99 for short, is a cartridge for the TI 99/4A home computer that allows for running ROM cartridge images stored on an SD card.

The FlashROM 99 supports ROM-only images of up to 32K that use the write-to->60xx bank switching scheme. It will not work with programs using GROMs or CRU-based bank switching.

The cartridge does not require the Peripheral Expansion Box and runs on both PAL and NTSC consoles.

Discussion thread on Atariage can be found here.

(Author: @ralphb)
 

flashrom99.jpg


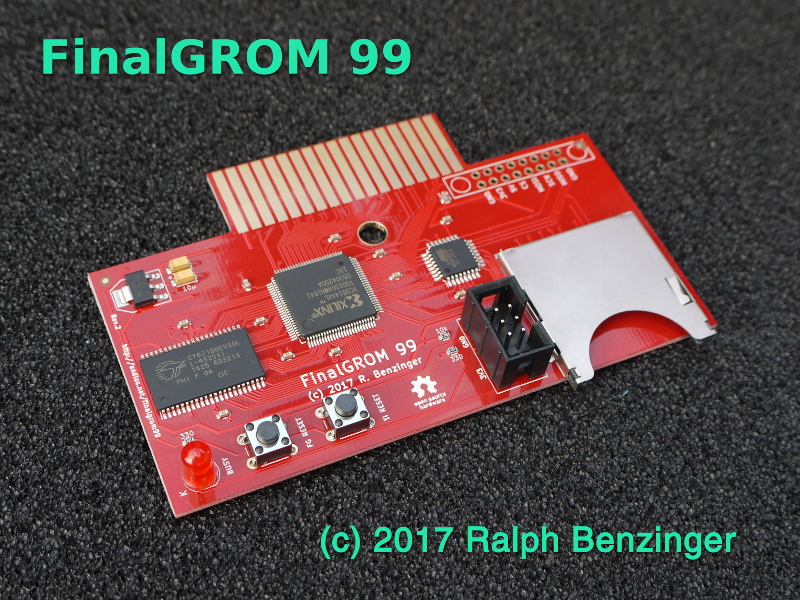
FinalGROM99 PCB file, firmware source code

The TI 99/4A FinalGROM Cartridge, or FinalGROM 99 for short, is a cartridge for the TI 99/4A home computer that allows you to run ROM and GROM cartridge images from an SD card.

It succeeds the FlashROM 99 released in 2016.


The FinalGROM 99 supports ROM images, GROM images, and mixed images of up to 1 MB in size that use the write-to-ROM bank switching scheme.

The cartridge does not require the Peripheral Expansion Box and runs on both PAL and NTSC consoles, including modified consoles with an F18A.

It will also run on v2.2 consoles and enables those to run ROM-only programs.


The development thread on Atariage can be found here.

(Author: @ralphb)
 

finalgrom99.jpg


5. Utilities (file transfer, graphics, sound, …)


File Transfer

TIImageTool win + linux

TIImageTool is a tool that allows you to open disk image files as used with many emulators, and to work on them with common disk operations (like cut/copy/paste of files).

It is particularly tailored for use with MESS but can also be used with other emulators.

Has support for v9t9 format, PC99 format, CHD format, working with files & directories, Archiver support (can process Archiver files on the images), …

This utility needs the Java Runtime Environment available for free at Oracle.

Supports Cf7a+ card images.

(Author: @mizapf)


TI99Dir win

TI99 filemanager for windows. Great for transferring disk images to the TI-99/4A.

Supports Cf7a+ cards and Cf7a+ card images.

(Author: @F.G. Kaal)


TiDisk-Manager OS X

The TiDisk-Manager is a disk tool for disk images from floppy disks used by a TI-99/4A home computer.

You will need an Apple Macintosh or Hackintosh running with Mac OS X 10.9 or newer.

Has many features including file preview, export, etc. and even an interactive editor to disassemble program files and create good readable source code.

The development thread on atariage can be found here

(Author: @HackMac)


Cf2k – Compact Flash 2000 TI-99/4A

Cf2k (Compact Flash 2000) is a file manager for the TI99/4a with a CF7A+ compact flash adapter.

With CF2k it is possible to protect/unprotect files, rename files/volumes, format volume, mount volume, copy/move/delete files,

execute program files, …

Supports Cf7a+ cards.

(Author: @F.G. Kaal)


Graphics

Convert9918 win

Windows program for converting images into TMS9918A Graphics II (bitmap) mode.

Output is in TI-Artist format or raw image/pattern dump.

The article Modern Graphics on the 9918APDF gives an interesting overview on the techniques used in Convert9918.

(Author: @Tursi)


GraphiCV win/linux/osx

Sprite Editor written in java. Draw your sprites on the PC and export them for use in Extended Basic and Assembler.

Also supports export to Colecovision C format.

Work with multiple sprite “layers” for creating multi-colored sprites.

Click here for the GraphiCV development thread on atariage.

Source code is also available at github. Check here.

This utility needs the Java Runtime Environment available for free at Oracle.

(Author: @unhuman)


Magellan win/linux/osx

TI-99/4A map editor written in java. This is the latest, updated, unofficial version.

Draw your maps/screens on the PC and export them for use in Extended Basic and Assembler.

Has a rich feature set: Import character set from ‘.PNG’ or ‘.GIF’ file, copy & paste, drawing functions, support for half-bitmap mode, Export in XB display merge format, etc.

Possibility to export maps as data statements for Extended Basic and Assembler, binary export also possible.

Click here for the Magellan development thread on Atariage

This utility needs the Java Runtime Environment available for free at Oracle.

(Author: @The Codex). Enhanced by @retroclouds, @sometimes99er, @Asmusr.


Sprite Editor TI-99/4A

TI-99/4A sprite editor written in C99. Runs from Editor/Assembler #EA5.

Draw your sprites in an emulator or on the TI-99/4A machine.

The zip file contains both the files for use in emulator and a TI disk image for easy transfer to the TI-99/4A.

README file with detailed instructions included.

You can see the Sprite Editor at work building some sprites: Jet Set Willyvideo and Parsecvideo.

(Author: @Willsy)


Sound

VGM player

Compresses VGM files into a format that can be played back on the TI using the included player from C and assembly.

(Author: @Tursi)


Mod2PSG2

Fully featured PC tracker for arranging music for the SN76489 and compatible sound chips. Can export to VGM and other formats.

(Author: KonTechs/Martin)


Sound List Ripper

PC tool for ripping and playing back sound lists from TI files. Supports basic editing of sounds lists.

(Author: @Asmusr)


Sound list player

Plays back sound lists from XB and assembly.

(Author: @matthew180)


Advanced Sound List Player

TI tools for editing and playing back advanced sounds lists.

(Author: @marc.hull)


Speech

QBOX Pro win

QBOX Pro is the windows software that converts WAV files to LPC speech data for playback on the TI-99/4A speech synsthesizer.

This is a 16bit windows application but it still runs in Windows 2000/XP/Vista.

It requires the BWCC.DLL library which can be found here.


BlueWizard osx

LPC analysis tool for the Texas Instruments TMS5220 chip. Replacement for QBOX Pro. Has very good speech quality.

Source code and pre-built install image for OS X can be found on gitHub here.

Discussion thread on Atariage available here.

(Author: @patrick99e99)


Python Wizard unix/win

This project is a python port (command line version and GUI) of the great macOS tool BlueWizard.

It is intended to convert (voice) audio streams into LPC bitstreams used in the TMS 5220 chip or e.g. in the Arduino library Talkie.

Now you can generate your own LPC streams and make your chips say the things you want them to.

(Author: @deladriere)


TI Synth Editor win

TI LPC speech pattern exploration and editing app in the spirit of the venerable Speecoder.

Watch the “How To” video to create custom speech synth here

(Author: @pixelpedant)


Editors

Notepad++ win

Notepad++ is a free source code editor that supports several languages.

Runs in Windows environment.


Notepad++ syntax highlighting file win

Syntax highlighting file for Assembler and Extended Basic to be used with the Notepad++ text editor.


6. Tutorials


Assembly language

Building a multi-bank ROM image PDF

Tutorial on compiling a 32K bank-switched cartridge ROM image starting from assembly source code (deref utility included).


How to implement an assembly sound player for XB web

Very well written tutorial on how to implement an assembly sound player for Extended Basic.

It covers the tools needed and steps involved.


Commented assembly source code

Not a tutorial in the classical sense, but the commented source codes of the below games should help you get the idea.

Pitfall! source code ZIP

Munchman source code PDF

TI invaders source code PDF

TI Invaders source code TXT

PARSEC source code PDF

Moon Mine source code PDF

Hopper source code PDF


Thank you @Ksarul for your OCR work on the PARSEC source code.

Thank you @Stuart for your OCR work on the TI-Invaders source code and tweaking it for assembly with Winasm99.

Thank you @dphirschler for pointing me to Hopper and Moonmine source code.


TMS9918/TMS9928 Video Display Processor

TMS9918/9928 video modes video

Video tutorial explaining the supported graphic modes of the video processor used in the TI-99/4A.


TMS9918/TMS9928 Sprites and Characters video

Video tutorial about the use of sprites and character patterns in the different video modes.


TMS9918/TMS9928 How to create a bitmap title screens video

Video tutorial on how to create a bitmap screen for games.


Speech Synthesizer

Convert WAV file for playback using speech synthesizer video

Video tutorial on how to use QBOX Pro to convert a 8kHz mono WAV file to LPC speech data

for playback on the TI-99/4A with the speech synthesizer device.

It shows how to embed the LPC byte stream into your own assembly language program.


Compilers

The Wilhelm Basic compiler video

Video tutorial on how to compile a basic program to assembly language.

(Author: @Opry99er)


File transfer

(TI99->PC) RS232 File Transfer video

Video tutorial on file transfer from the TI-99/4A to the PC using a serial connection cable.

(Author: @Opry99er)


(PC->TI99) RS232 File Transfer VIEW PART 1 / VIEW PART 2 video

Video tutorial split in 2 parts dealing with file transfer from the PC to the TI-99/4A using a serial connection cable.

In detail: DL a game from TI Gameshelf, Use ARC303G to unarchive it, Test in Classic99, Transfer using QModem and MFM, Running game on TI.

(Author: @Opry99er)


7. TI-99/4A related websites


TI-99/4A @ wikipedia

Introduction and basics of Texas Instruments TI-99/4A Home Computer.


ninerpedia

Wiki with information on MESS and its multicart format (RPK). Home of the TI-FAQ.


Thierry Nouspikel’s Tech Pages

Probably the best TI hardware and software tech page. It has a wealth of technical details on all things TI-99/4A.

This includes GPL, GROM, keyboard scanning, speech, etc.

You can also download the full site as a zip file for offline viewing.


Mainbyte’s home of the TI-99/4A

Very good tech site with many detailed pictures and reference area.

Includes various projects for upgrading your TI-99/4A, e.g. build a supercart cartridge.


Jon’s hexbus page

Several hardware projects including pictures. Home of the 64K bank-switched cartridge project.

(Author: @acadiel)


[code|Hack|Create]

New website run by Matthew of the Atariage group. The site covers many new hardware projects as the F18A FPGA based VDP and Bank-switch mini 256K.

There’s also a store where you can buy cartridge PCB’s and other funky stuff.

(Author: @matthew180)


The nanoPEB & CF7+ Website

The official website. Has the documentation, tools and some source code of the popular TI-99/4A Compact Flash device.


TurboForth.net

TurboForth.net is the companion web site for the TurboForth system written in TMS9900 Assembly Language by Mark Wills for the Texas Instruments TI-99/4A computer.


TI projects page

Several hardware and software projects for the TI-99/4A.

Home of TI-99Dir, TI99HDX and several other must-see projects.

(Author: @F.G. Kaal)


TI-99/4A Home Computer Book Archive

Site where you find many books about the TI-99/4A not seen elsewhere, all collected by @airernie and now hosted by @acadiel

(Author: @airernie)


TI-99/4A Game Shelf

Provides a gallery of interesting games with images of the opening screen as well as an

in-play snapshot, along with a brief review tested on a real TI 99/4A system. Hardware

requirements are also listed. Has many good Extended Basic games.

(Author: @Vorticon)


WHTech

WHTech is the primary archive – though it’s a bit overwhelming.

But pretty much all software, hardware docs, etc, are available there.


99er.net

Site with useful file archive and forum functionality.


comp.sys.ti

Covers all TI devices, including calculators.
TI-99/4A FAQ: PC to TI transfers with stock RS232/nanopeb and HDX server

You need:

TI-99/4a with either a RS232 card (TI and Corcomp have been tested, someone needs to test a myarc card) OR a nanopeb.

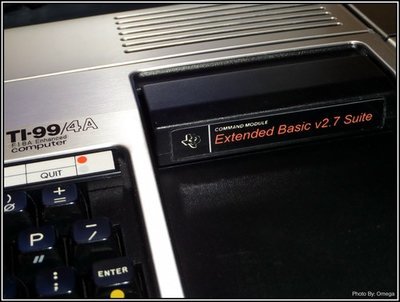
CFHDXS1 software on the TI OR a XB27 suite cartridge which has that software included as option U.. You can order both of these on arcadeshopper.com for a reasonable fee.

A rs232 cable (for the TI RS232 card) or a null modem cable (for the nanopeb) with the right ends on it for the PC side and the TI side.

A PC with a REAL RS232 port or a quality USB to RS232 adapter. Cheap new ones tend to have issues. I picked up a nice 25pin one at the local recycler that works great! A rs232 card for a desktop costs less than $20 on newegg/amazon.

Connect the cable from the PC to the TI. Remember that you use a straight through cable for the TI cards, and a null modem cable for a nanopeb. That’s because the nanopeb maker decided to put a PC style rs232 port on it so it’s backwards from a TI port.

PC Side:

go here: http://hexbus.com/ti99geek/

Click on projects then TI99HDX Server, download the server software latest version. Install on your PC somewhere you can find it. (I did C:/hdx/)

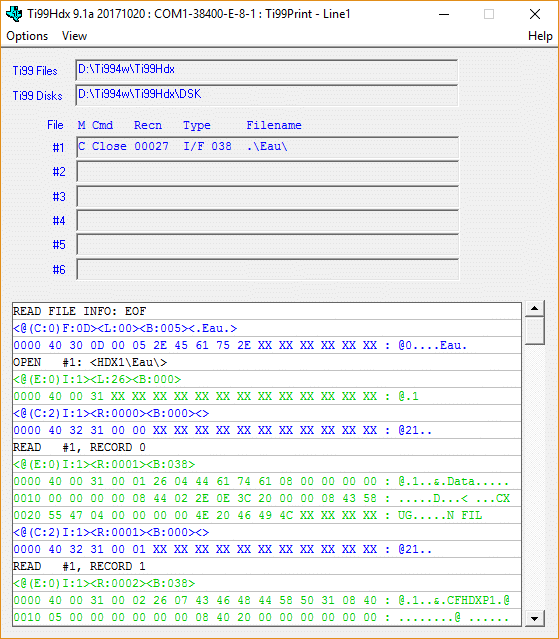
Run this program it looks like this:

Select Options and point the TI99 files directory to a directory you store FIADS or v9t9 format files into, if you don’t have one, for simplicity make a C:\tifiles directory and use that.

Select Options and select the correct COM Port under Communications Settings.

Also get the ti99DIR file manager software from that site and install that on your PC. Point one side of it at that same directory (C:\tifiles or whatever directory you picked above) you do this by hitting file, then select directory.

Point the other side at your downloads folder or your ti disks folder where you store disk images and downloads for the TI. whatever applies in your situation. You select which side you want to work with by clicking on it with your mouse and it will highlight.

You can then click into disk images and archive files and copy the individual files to the tifiles directory.. This is important as that is the file directory you will see on the TI-99/4A.. You can shift-click files to select groups then right click to pick copy. On the tifiles side you will note that the files either state they are TIFILES or V9T9 files on the right side of the listing. If they are not V9T9 files, you must convert them with the tools menu, convert TIFILES to V9T9 file.

Leave HDX server running on the pc..

TI Side:

Open CFHDXS1 with editor assembler, funnelweb, xb loader, dm2k, etc.. OR insert the XB27 cart and hit U.

At this point you should get a fun message to the effect of ” Ti99Hdx: <TI99/4a Initialized, HDX DSR version 02>” on the hdx server software on your pc. If you do not get this message you have either a cable problem OR a rs232 problem.


Hit any key on the TI and then enter HDX1. in the SRC: prompt this should give you a listing of the files in the tifiles directory on your PC. You can select files with INSERT (Fctn-2) and then hit PROCEED (Fctn-6) to pick copy.. then enter the TI disk drive you wish to copy too DSK1 etc.. in the DST: prompt and it’s copying files from your PC to your TI.

For more help with CFHDXS hit H when it is running and it will display it’s help screen.

Reverse the SRC and DST to copy the other direction.

Classic99 will read these files if you copy them into the DSK folders, alternatively you can just point HDX server to use the DSK1 folder under your classic99 directory and files can be used there directly.


TI-99/4A FAQ: Maintenance – Console disassembly

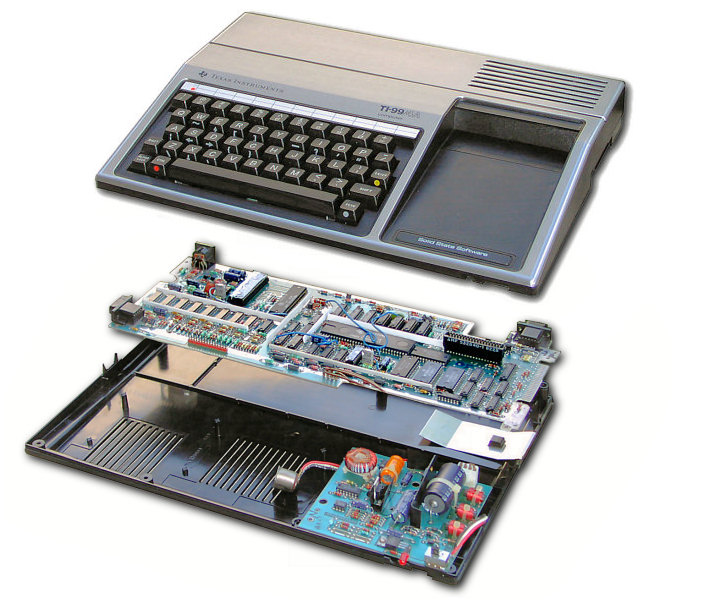
TI-99/4A Console Disassembly

This shows how to disassemble the console for maintenance or for other modifications. The only tools you really need is a Philips screwdriver and some heat sink compound.

Please make sure that all wiring and soldering is double checked before re-applying power. Though computer components are pretty hardy some do not take to being wired up backwards or incorrectly. I have done my best to make sure that all diagrams and instructions given here are correct, but I can not be responsible for any damage an incorrect upgrade might cause. Also keep in mind that this will probably void any warranty :>).

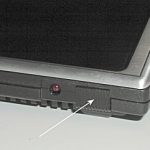
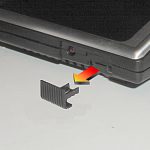
To get started disassembling the console you will need to remove the switch extension.

Just pull the switch extension straight out as shown by the arrow in the above picture. It simply snaps in and out.

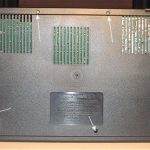
The next step is to remove the 7 screws which holds the consoles two halves together. The best practice is to lay the console on a towel so you do not scratch or dent the soft aluminum covers, or scratch the plastic on the newer beige models.

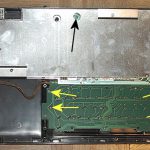
You are now ready to remove the bottom of the console. All the internal parts are fastened to the top of the console. Next remove the power supply. It is fastened by 2 screws shown by the two arrows in the above picture.

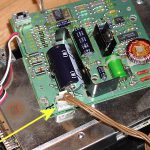
After the 2 screws are removed, pull out the power supply and turn it over. The arrow points at the connector which connects the power supply to the motherboard. Some earlier models had the connector halfway between the motherboard and power supply. Squeeze the clip and pull the connector from the power supply. This connector can only go back on one way (unless you try really, really hard).

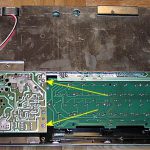
Now you are prepared to remove the motherboard and keyboard. The keyboard is held in by 4 screws shown by the yellow arrows, and the motherboard is held in place by 3 screws shown by the black arrows.

Now you are ready to remove both of these components. They should just pull right out of the case. Be careful handling both pieces at this point as you don’t want to break a wire on the keyboard connector.

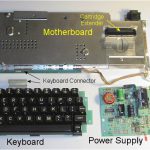
This pictures shows the 3 main components of the TI-99/4A. In this picture I have unplugged the keyboard from the motherboard.

We are now ready to remove the shielding from the motherboard. The first step is to remove the cartridge extender, it just pulls out. Next remove the two clips which also just pull out.

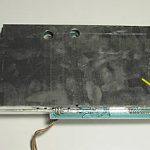
On the end of the motherboard you will notice a copper shield which fits around the expansion end of the motherboard. Some motherboards use 4 screws while some only use 2. This one happens to use 2 screws. Remove all the screws holding the shielding. Be careful with these screws, particulary when re-assembling as you can easily strip them, and they are very small.

To finish the removal of the shielding you will need to remove 3 bolts. They are shown by the arrows in the above picture. They do have small lockwashers, so be sure to keep an eye out for them when you remove the nuts. BE SURE to notice the direction the bolts are inserted, as on some motherboards if you put them in “upside down” the case will hit them, and not go all the way together.

This picture shows the motherboard in all it’s 16 bit glory! The arrows show the heat sink and video chip. You will probably notice that the heat sink material has dried up. I suggest cleaning the old off and applying new heat sink compound before re-installing the shielding.

To re-assemble the console, you just need to reverse the steps above with a few things to keep in mind.

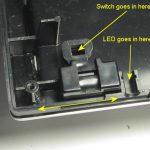
One, is to make sure the second part of the switch is in it’s correct position. The above picture shows this. This part needs to be in it’s correct slot before re-installing the power supply. The switch on the power supply must fit in the square on this piece. Also the LED fits into the slot shown by the arrow above.

Another is to make sure that you have all the wires routed correctly. They pretty much will only go one way but you don’t want to pinch any of the wires. You can use the above pictures to see how they go.

Remember to put the cartridge extender back in, I have put several of the consoles back together only to find this part sitting on the bench. Makes it tough to use any cartridges :>).

The last thing to do is to put the sliding cover back in on the expansion slot in the case. Though leaving this out will not cause any issues, any good TI’r would be embarrassed not to have this installed. The picture above shows this part. You can usually find this part laying on the floor somewhere.

TI-99/4A FAQ: Maintenance – Cleaning Cartridge Port

Cleaning Console Port

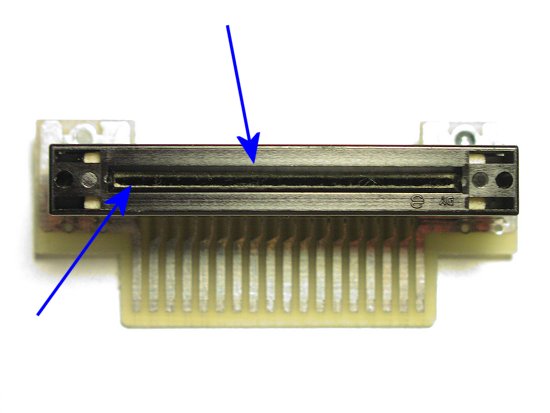
The only way to really give the port connectors a good cleaning is to remove the port from the console. This might seem like a lot of trouble but more than likely this should be the only cleaning it will need for a very long time. For instructions on how to disassemble the console go Here

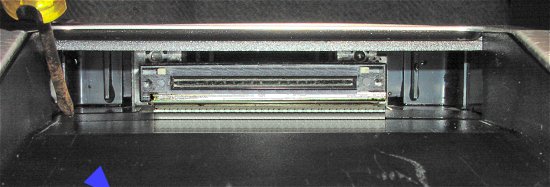
The above picture shows the cartridge port with the cartridge door open. You can’t really tell from the picture but this port is quite dirty.

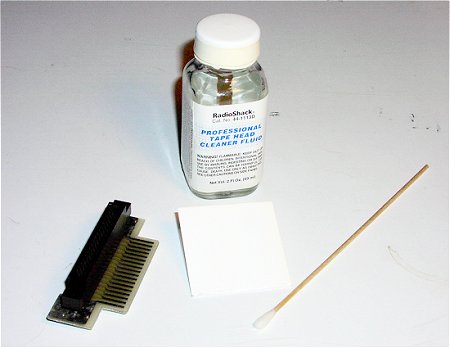
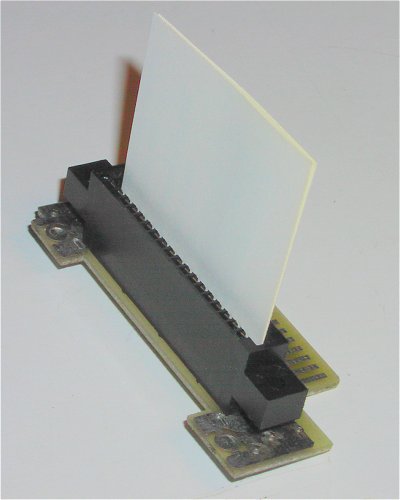
To clean the port use isopropyl alcohol or Tape head cleaning solution. Also use a standard business card or index card (cut slightly to fit into the port), folded in half, and a q-tip to apply the cleaning solution to the end of the business card.

Remove the cartridge port from the motherboard by pulling it straight out. You do not need to remove the metal shielding from the motherboard to do this.

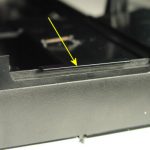
The above picture shows the port. The two arrows are pointing at the felt “cleaning strip” and the cover for it.

The idea behind the felt pad was to act as a cleaner for the cartridge contacts when you plugged in a cartridge. Most suggest that this felt pad be removed as it does more harm than good. It just seems to collect more dirt then it ever cleans off.

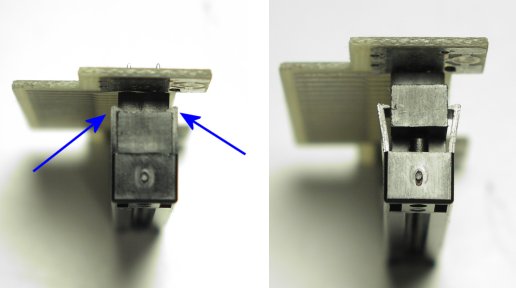
Removing the cover and felt pad is a simple process and the two pictures show how to do this.

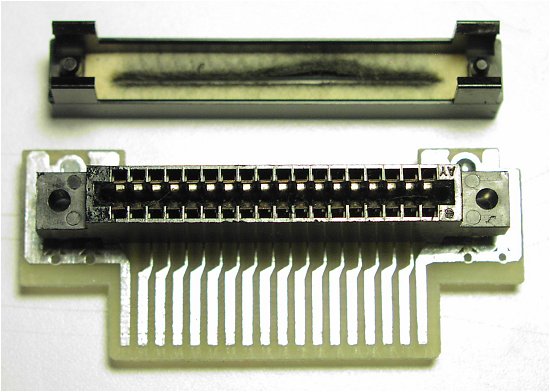
The picture above shows the cover and felt pad removed from the port connector. As you can see the felt pad has seen better days.  Do not re-install the felt pad. This is just to show what it might look like.

The next step is to clean the internal contacts on the port connector. Use a folded business card or index card and apply isopropyl alcohol or cleaning fluid to the end which will be inserted into the port. Do this several times and then use a new clean card and repeat the cleaning. Repeat this until the cards come out clean.

TI-99/4A FAQ: Mini Memory

Mini Memory

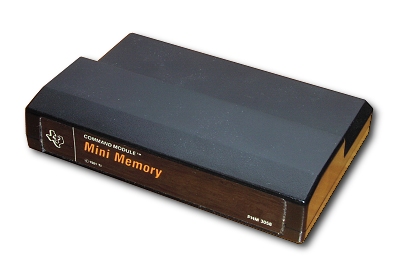
The Mini-Memory Cartridge is a neat device that allows one to actually store small programs in the cartridge. It also comes with an assembly editor, which os how a lot of TI-99/4A users first worked with assembly language.

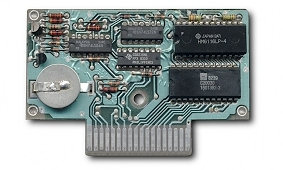
This is the “insides” of the Mini-Memory Cartridge. Notice the battery which kept a small charge on the memory chips so it could keep programs even after it was removed from the computer. If you pick one of these up, you will most likely have to change this battery. Here is a link to the instructions for doing just that: http://www.mainbyte.com/ti99/minimem/minimem.html

By Ira McComic

You know looks can be deceiving. For example, who would ever suspect that a bespectacled, mild-mannered reporter for the Daily Planet could actually hop over a skyscraper with a single bound? In the same way, there’s a lot more to TI’s new Mini Memory Command Module than meets the eye. It appears to be just a normal, garden-variety Command Module*the same size, same shape, the same black unassuming case. But lying inside that plain cover are the ingredients to convert your TI Home Computer from a good BASlC programming machine into a trim and efficient assembly language instrument.

The name itself is a clever disguise. “Mini” Memory, indeed! If you believe that all there is inside that plastic case is just a little bit of memory, then you’d probably believe the Trojan Horse was nothing more than an overgrown child’s riding toy! There’s actually 14K bytes of memory sitting in there. 4K bytes of RAM, 4K bytes of ROM, and 6K bytes of GROM.

RAM (read/write) memory is the kind of memory in which our programs are stored. You know how it works. You write a program and it’s stored in RAM. When you turn off the computer, the program you wrote is gone, unless you had the foresight to save it on a cassette or diskette before you flipped the switch on the computer. Now, here’s the first surprise from the Mini Memory Module: You can store a program or data in its RAM and your program or data is not lost when you turn off the computer. In fact, you can store a program or data in the Mini Memory Module’s RAM, turn off the computer, remove the module from the console and carry it around with you, just as you can a cassette or diskette. This seeming miracle is possible because the module contains its own life-support system. A battery inside the module keeps the contents of the RAM alive. The RAM components are CMOS devices and are power misers. It only takes a small trickle of current to keep the little critters alive when they are not being used. The battery inside the module should last you a couple of years. When you finally need a new battery, you can exchange the module for a new one.

Battery-backed RAM can be real handy, if you think about it. Just imagine*you can write a new program, store it in the Mini Memory Module, turn off the computer, yank out the module, zip over to your friend’s house where you plug in the Mini Memory Module, and instantly load your new program into your friend’s computer so he can admire your handiwork. No cassettes, no disks, no messy cables, and no long waits.

Besides the battery-backed RAM, the Mini Memory Module also has 6K bytes of GROM (Graphics Read Only Memory) and 4K bytes of ROM (Read Only Memory). Inside the GROM and ROM are seven additional TI BASIC subprograms, including PEEK and POKE.

This same GROM and ROM also gives you access to many of the computer system’s routines from assembly language programs. There’s still more. As you develop your assembly language programs, you’ve got some help. The ROM contains a powerful program debugger called EASY BUG which you can use to exterminate those pesky �logic vermin� which sometimes infest programs.

At this point, you may be saying to yourself, “What good does all this assembly language access and debugging stuff do me, anyway, without an assembler?” Glad you asked. Here’s the next bit of exciting news. The Mini Memory Command Module comes with a cassette which contains an assembler. You can load this assembler into memory, enter assembly language statements, and have the assembler translate the statements into 9900 object code for you.

See what I mean? There’s a lot more to this Mini Memory Module than its alliterative name. . . The Mini Memory Module is, indeed, full of pleasant surprises. Here’s what we’ve discovered so far: First, it’s got 4K bytes of battery-backed RAM where we can save programs and data. Secondly, it’s got 10K bytes of ROM and GROM which contain additional TI BASIC subprograms, provide a passport into the computer system’s routines, and hold the EASY BUG debugger. Thirdly, the Mini Memory Module comes with an assembler so you can create your own assembly language programs. That ought to be enough to even coax a smile out of a mother-in-law, but there is still one more surprise: On the same cassette with the assembler is a bonus. It’s a demonstration program which produces a fascinating color burst of patterns on the monitor or TV display.

Let’s explore these items one at a time.

FILE STORAGE

Probably most persons will use the Mini Memory Module most often for temporary storage of programs and data. You can think of the Mini Memory Module as a very fast access storage device.

Additional Files

When you have the Mini Memory Command Module plugged in, the 4K-byte RAM has the file name MINIMEM for TI BASIC program and data storage. The RAM occupies physical addresses 28672 through 32767 (hexadecimal 7000 through hexadecimal 7FFF). You can save programs in this file and load programs from it. (For example, to save a TI BASIC program, just enter the command SAVE MINIMEM.) You can also store data in this file using the file specifications available for any TI BASIC file. For example, the following statements open the Mini Memory file and store four data values in the file.

OPEN #3 :”MINIMEM”,RELATIVE,FIXED,UPDATE
INTERNAL
PRINT #3: A,B,C,D

With the Mini Memory Module you can also access a second new file. EXPMEM2 is the name of a 24K-byte memory file located in the 32K Memory Expansion unit. EXPMEM2 is only available, however, if you have the Memory Expansion unit connected to your computer and turned on.

ROM AND GROM PROGRAMS

Inside the Mini Memory Command Module’s 10K bytes of “firmware” (that’s computer talk for ROM and GROM) are additional TI BASIC subprograms, hooks to connect assembly language programs to the computer system’s programs, and a program debugger for machine language programs.

Additional TI BASIC Subprograms

Seven additional TI BASIC subprograms are yours with the Mini Memory Module. These subprograms are PEEK, PEEKV, POKEY, CHARPAT, INIT, LOAD, and LINK.

The PEEK subprogram reads bytes of CPU RAM data and copies the data directly into TI BASIC variables. For example, the statement:

CALL PEEK (8192,A,B,C(8))

reads three bytes of data from address 8192 and up, and assigns the values read to the variables A, B, and C(8).

The PEEKV subprogram reads bytes from VD1� RAM. It works exactly like PEEK, except PEEKV accesses VDP RAM instead of CPU RAM.

The POKEy subprogram stores data values into VDP RAM. For example, CALL POKEV(784,30,30,30) writes the value 30 to VDP RAM locations 784, 785, and 786.

The CHARPAT subprogram reads a 16-character pattern identifier that specifies the pattern of a character code. For example, CALL CHARPAT(68,D$) places the pattern defining character code 68 in the string variable D$.

The three TI BASIC subprograms INIT, LOAD, and LINK interface assembly language programs and TI BASIC programs.

The INIT subprogram initializes the CPU memory for assembly language programs. The LOAD subprogram serves two purposes: it loads assembly language object files into CPU memory; and it loads data into CPU memory.

There are two forms of the LOAD subprogram. One form is used to load an object file from a storage device into memory and the second form is used to load data directly into CPU memory. For example, the statement CALL LOAD (“DSK1. DEMO”) loads the file DEMO from the diskette in Disk Drive 1.

The second form of the LOAD subprogram is a POKE function for CPU RAM. For example, the statement CALL LOAD (8197,85,40) loads the value 85 into memory location 8197 and the value 40 into memory location 8198.

The LINK subprogram passes control and, optionally, a list of parameters from a TI BASIC program to an assembly language program. For example, the statement CALL LINK (“PROG1”,A,E(9)) passes control from a TI BASIC program to an assembly language program named PROG 1 and passes the variables A and E(9) to the program.

Access to System Routines

The utility routines resident in the Mini Memory Command Module can be called from an assembly language program to access machine resources and interface with the TI BASIC interpreter. It’s fair to warn you that the use of these routines requires a knowledge of the routines themselves and the organization of data used by the routines. You can get additional information about these routines from the Editor/Assembler owner’s manual, (This is an excellent book, by the way. It’s packed with inside information on the Home Computer’s architecture.)

Two types of access programs are resident in the Mini Memory Command Module. One program contains a collection of system utilities with which to link to ROM/GROM routines, perform a keyboard scan, access the VDP, etc. The individual utility programs are classified as either a “Standard Utility” program or an “Extended Utility” program.

A second program contains TI BASIC interface utilities with which an assembly language program can access variables passed through a CALL LINK statement in a TI BASIC program. This program also contains an error-handling utility to return exceptions to a TI BASIC program.

Standard Utility Programs

Here’s a list of the standard system utilities which become accessible with the Mini Memory Command Module.

* VDP Single Byte Write * write a single-byte value to a specified VDP RAM address.
* VDP Multiple Byte Write * write multiple bytes from CPU RAM to VDP RAM.
* VDP Single Byte Read * read a single byte from a specified VDP RAM address.
* VDP Multiple Byte Read * read multiple bytes from VDP RAM into CPU RAM.
* VDP Write to Register * write a single-byte value to any of the VDP RAM registers.

* Keyboard Scan * scan the keyboard and return a keycode and status. This routine can also read the position of the Wired Remote Controller.

Extended Utility Programs Extended utilities are provided to access routines in the console CROMs and ROMs. These utilities are GPLLNK (link to GPL routines in GROM), XMLLNK (link to routines in ROM), and DSRLNK (link to Device Service Routines). The Mini Memory Module manual (try to say that three times real fast) advises that you ought to know what you’re doing before you access these routines.

GPLLNK Routines The GPLLNK routines are as follows:

* Load Standard Character Set * load the standard character set into VDP RAM.
* Load Small Character Set * Loads the small character set (for the 40-column “Text Mode”) into VDP RAM.
* Execute Power-Up Routine * Initializes the system as if the computer had just been turned on.
* Accept Tone * Issues an accepting tone for input.
* Bad Response Tone * Issues a bad-response tone warning.
* Bit Reversal Routine * Provides a mirror image of a byte of information. (This is often handy to form a mirror image of a character definition.)
* Cassette Device Service Routine * Accesses a cassette tape recorder/player as a storage device.
* Load Lower Case Character Set * Loads the lower-case character set into VDP RAM.

A number of floating point routines are also available through GPLLNK. Here they are:

* Convert a floating-point number to an ASCII string.
* Compute the greatest integer contained in a value. * Raise a number to a specified power.
* Compute the square root of a number.
* Compute the inverse natural logarithm of a value.
* Compute the natural lo~ of a number.
* Compute the cosine of a number.
* Compute the sine of a number.
* Compute the tangent of a number.
* Compute the arctangent of a number.

XMLLNK Routines

Routines in the console ROM can be accessed through the XMLLNK routine. The following routines can be called from an assembly language program using XMLLNK.

* Floating-point addition.
* Floating-point subtraction.
* Floating-point multiplication
* Floating-point division.
* Floating-point compare.
* Floating-point stack addition.
* Floating-point stack subtraction.
* Floating-point stack multiplication.
* Floating-point stack division.
* Floating-point stack compare.
* Convert a string to a number.
* Convert a floating-point format number to integer.
* Push a value onto the value stack.
* Pop a value from the value stack.
* Convert an integer number to floating-point format.

DSRLNK Routines

DSRLNK links an assembly language program to a Device Service Routine (DSR) or subprogram in ROM. As with GPLLNK and XMLLNK, TI cautions you to make sure you know what you are doing before using DSRLNK.

A DSR is a machine language program that TI has burned into ROMs found in each of its peripherals. Since each peripheral contains its own custom “operating system,” the TI-99/4 did not have to be designed to anticipate future peripheral requirements*Ed .1

TI BASIC Interface Utilities TI BASIC interface utilities allow an assembly language program to read or assign values to variables passed in a parameter list from a CALL LINK statement in a TI BASIC program. These utility routines include argument-passing utilities and an error-reporting utility.

The following are the TI BASIC interface utilities.

* Assign a numeric value to a numeric variable.
* Assign a string to a string variable.
* Retrieve the value of a numeric parameter.
* Retrieve the value of a string parameter.
* Report an error. (The assembly language program can report any existing TI BASIC error or warning message upon returning to TI BASIC.

EASY BUG Debugger

Also inside the Mini Memory Module’s ROM is EASY BUG. EASY BUG is a versatile program development tool with which you can (1) debug your assembly language programs, (2) access the input/output ports of the computer, (3) load programs, and (4) store programs. And, as the name implies, it really is easy to use. -With EASY BUG, you can inspect and (optionally) modify the contents of CPU and VDP memory, display the contents of ROM, run assembly language programs from EASY BUG, directly access the peripheral devices which are connected to the computer via the 9900 microprocessor’s serial I/O port (the CRU), and save and. load programs on cassette.

LINE-BY-LINE SYMBOLIC ASSEMBLER

A line-by-line symbolic assembler on a cassette tape is supplied with the Mini Memory Module. It assembles assembly language statements and stores the object code directly into the 99/4�s CPU RAM. The assembler is a derivative of the line-by-line assembler used by the TM990/189 board (the University Module). You can make both forward and backward references to one- or two-character labels with the assembler. Each source statement you enter is immediately assembled into object code and stored into memory. Some source code is retained in a nine-page text buffer. You can scroll the screen to review previously entered lines of source code by pressing the Up- and down-arrow keys. The source program cannot be saved, however.

The line-by-line assembler occupies about 2K bytes. When it is loaded into the Mini Memory Module’s 4K byte RAM, you still have about 2K bytes of memory for your assembly language program.

Assembler Directives

The assembler recognizes seven directives:

* The AORG (Absolute Origin) directive establishes the location counter value to set the starting address of the assembled code.

* The BSS (Block Starting with Symbol) directive re- serves a block of memory without initializing the space.

* The DATA (Data Initialization) directive initializes a word or words of memory to a specific value.

* The END (End Program) directive terminates the assembler and causes a display of the number of unresolved references, if any.

* The EQU (Equate) directive defines a value for a symbolic constant.

* The SYM (Symbol Table Display) causes a display of all symbols and theft associated values in the program.

* The TEXT (String Definition) directive causes a string of characters to be translated into their ASCII code and stored as a part of a program.

[An assembler “directive” is a programming-aid command which directs the assembler to perform certain operations at assembly time. An assembler may execute many “instructions” (telling the microprocessor to perform single functions such as Add or Move) to satisfy one directive*Ed.]

DEMONSTRATION PROGRAM

Along with the line-by-line assembler on the cassette is an assembly language demonstration program called LINES which draws a colorful line design on the screen. The LINES program can be run only on the TI-99/4A Home Computer, however, because it requires the enhanced graphics processor contained in the TI-99/4A. [A forthcoming issue will carry an explanation of how the “bit map” mode (necessary for the LINES program) of the TMS99 WA Video Display Processor works*Ed

OPERATION

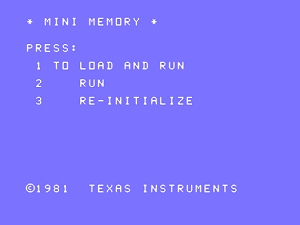
TI has a knack for creating complex and versatile programs that are still simple to operate; they’ve definitely done it again with the Mini Memory Module. When you plug in the module, turn on the computer, and pass the opening credits on the Master Title Screen, you are presented with a simple, three-choice selection screen. You can choose TI BASIC, EASY BUG, or MINI MEMORY.

If you select MINI MEMORY, you are presented with a second three-choice selection screen. You can choose to load an object program into memory and run it, run a previously loaded program already in memory, or re-initialize the module to prepare it for loading new programs or storing data, Pick a number, pluck a key and you’re off and running. It’s as easy as eating oatmeal cookies!

CONCLUSION

This has got to be one of the best deals around. There’s 4K bytes of RAM with battery backup so that all the good stuff stored in the RAM is not lost when you turn off the console or even when you remove the module. There’s 1OX bytes of ROM and GROM which give you seven additional TI BASIC subprograms (including PEEK and POKE), access to system routines from assembly language, and routines to allow you to interface assembly language programs to TI BASIC. You’ve got a user-friendly program debugger, a symbolic line-by-line assembler, and a captivating graphics demonstration program. All of this, plus S4 pages of docomentation for $99.95 (suggested retail price). With all this to offer, it’s really not too hard to see why there’s definitely more to the Mini Memory Command Module than meets the T-eye…

TI-99/4A FAQ: Supercart

The Supercart adds 8K of battery-backed RAM to the Editor/Assembler module. The utility of this device derives in large part from its capacity to provide E/A module menu access to assembly language software. In effect, this means you can write your own 8K battery-backed command module software.

Do it yourself projects:

  • http://www.mainbyte.com/ti99/supercart/supercart.html
  • http://www.mainbyte.com/ti99/supercart/supercart_4bank.html

Purchase a pcboard for this:

There were commercial products available on the market for a time in the 80’s as well.


TI-99/4A FAQ: Maintenance Repairs and troubleshooting

My TI isn’t working right! help!

repair fix rebuild troubleshoot etc

    • Keyboard issues
      • The keyboard is connected directly to the TI motherboard with a pin connector. This can become loose/dirty and may need cleaning/reseating. There is no logic within the keyboard is is merely shorting the keyboard lines when you hit the keys.
      • If your cable is damaged there are replacements available at http://www.arcadeshopper.com/under hardware/cables
      • Alpha Lock issue: With the alpha lock key on you are unable to use the up direction with the joysticks. Release alpha lock to play games OR do this fix: http://mainbyte.com/ti99/console/alpha_lock.html
      • What keyboard do I have? There were at least 5 manufacturers of keyboards for the 99/4a. http://mainbyte.com/ti99/keyboard/keyboard.html has good pictures/info/schematic.
        • Mitsumi: These keyboards do not have any solder points except for the alpha-lock key connection and the ribbon cable.
        • Image result for ti-99 keyboard mitsumi
        • Alps and others: These keyboards have solder points on the back of the PCBoard
          • these keyboards sometimes have dirt/corrosion in the switches that can be cleaned with contact cleaner or alcohol.
          • Example of square keyboard switches with key caps removed:square keyboard switches
      • Console just BEEPS (no display or all one color display)
        • The start up routine of a 99/4a initializes the sound chip with a tone and then the rom boot routine shuts off the tone.. If it just beeps either there is a bad connection to a peripheral OR a board level issue that is causing the startup routine to “lock”. Check all socketed chips for good connection/corrosion etc and reseat.  Sometimes this is caused by a damaged 9900 and it will need to be desoldered and replaced.
      • Scrambled/Garbled screen graphics/text
        • 80% of the time this is VDP ram and it will need to be replaced.
          • Here is a great page on how to determine what RAM chip is bad: http://www.ninerpedia.org/index.php?title=Troubleshooting
            • Don’t use 4116 ram, it costs more than 4164 and uses more power/generates more heat. 4164 will last longer.  See this post for more info https://atariage.com/forums/topic/257923-replacing-4116-ram-with-4164-for-reliability/
            • VDP Ram is soldered into the motherboard and will need to be desoldered and replaced (suggest it is replaced with sockets and new ram inserted into the socket) this ram is TMS4116 static ram. Located in number 6 in this photo: http://mainbyte.com/ti99/hardware/big_mother2.jpg
            • The F18A VGA VDP replacement contains it’s own VDP ram so replacing the TMS9918a VDP in your 4/a with a F18A will also replace bad memory without having to solder..
        • On NTSC/USA machines TMS9918a VDP is the hottest component on the motherboard and this tends to end it’s life prematurely. Daily use consoles tend to have the VDP fry sooner or later. This chip is socketed so it is relatively easy to replace. It is covered with heatsync compound and there is a metal slug that sits on top of it under the RF shield on a original 4/a. On a QI model there is a metal heat-sync clipped to the 9918a.
      • Cartridges don’t work or don’t work reliably.
        • The TI cartridge port is the most used part of a console. It tends to get dirty and gummed up. Info here on cleaning carts and the port: http://mainbyte.com/ti99/minimem/cart_fix.html
        • Replacement cartridge port boards are available on ebay and from vendors.
repair fix rebuild troubleshoot

TI-99/4A FAQ: Compatible computers

Compatible computers?

Myarc Geneve 9640

The Geneve 9640 is an enhanced TI-99/4A clone. It was sold by the company Myarc as a card to fit into the Texas Instruments TI Peripheral Expansion System. Released in 1987, it is in many ways similar to the earlier TI-99/8, which was in prototype form in early 1983. The Geneve 9640 was designed by Paul Charlton,[1] and the graphical swan on the boot up screen was designed by Mi-Kyung Kim.[2]

The Geneve 9640 features a 16-bit TMS9995 processor clocked at 12 MHz. A Yamaha V9938 video display processor (the same one used in the MSX2 family of home computers) provides 256 color graphics at a 256 x 424 resolution, 16 color graphics at a 512 x 424 resolution, and an 80 column text mode. Audio is produced via an SN76496 programmable sound generator, capable of producing three simultaneous square waves at sixteen different volume levels, as well as an additional noise channel that could produce either periodic or white noise in three different frequencies and at sixteen different volumes. An IBM PC XT compatible detached keyboard and a mouse are used for input. The Geneve 9640 is compatible with nearly all software written for the TI-99/4A. An adapter was made by a company named Rave to allow the sidecar-only Speech Synthesizer to be installed inside the Peripheral Expansion System.

SGCPU – Second generation CCU Card

Tomy Tutor

The Tutor contains a lot of the same hardware and software, and 9995 processor like the Geneve.. in fact Tomy games have been converted to run on the Geneve.

The Tomy Tutor, originally sold in Japan as the Pyūta (ぴゅう太) and in the UK as the Grandstand Tutor,[2] is a home computer produced by the Japanese toymaker Tomy. It was architecturally similar, but not identical, to the Texas Instruments TI-99/4A, and used a similar Texas Instruments 16-bit CPU.[3] The computer was launched in Japan in 1982, and in the UK and the United States in the next year.[4]

History

Produced by Matsushita, the computer was released in Japan in 1982 under the name Pyūta.[4]

Tomy described the Tutor, with 16K RAM, as good for games and education. The company stated that its documentation would let an eight-year-old child use the computer without adult supervision.[5]

One of the major flaws pointed out with the Tutor was not its hardware, but its marketing: the Tutor was announced as a children’s computer when in fact it was practically a cheap, evolved version of the TI-99/4A, even having a similar 16-bit CPU (the TMS9995, closely related to the TI-99/4’s TMS 9900);[3] other competitors in its price range still used 8-bit microprocessors.
The Pyūta Jr. was a console version of the Pyūta, released in April 1983,[6] and similarly was only sold in Japan.
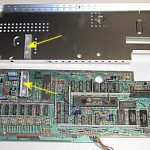
In Japan, Tomy set a sales target of about 90,000 units and ¥5 billion revenue for the first year by selling Pyūta to elementary and junior high school students as a “drawing computer”, having nearly 40,000 units shipped in its first 4 months as of August 1982.[7][8] However, sales fell sharply when Nintendo released Family Computer (later deployed as Nintendo Entertainment System) in 1983 as a cost-effective option. In February 1985, Tomy ceased its production and withdrew from the market.[9] As of May 1984, a total of 120,000 units were shipped for domestic and export use in Japan.[1]

In the other hand, the Tutor did not sell well against the ZX Spectrum in the UK and the Commodore 64 in other countries outside Japan. It ended up being removed quickly from the market and replaced the following year by the Pyūta mk2 with a standard mechanical keyboard instead of the original “Chiclet”-style keyboard. However, the new model seems to have been sold only in Japan, and even then only for a short period of time.

Technical specifications