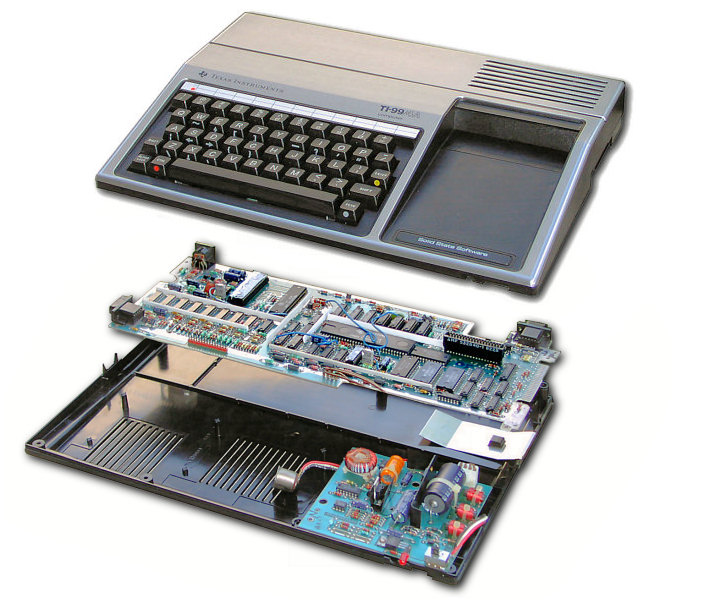
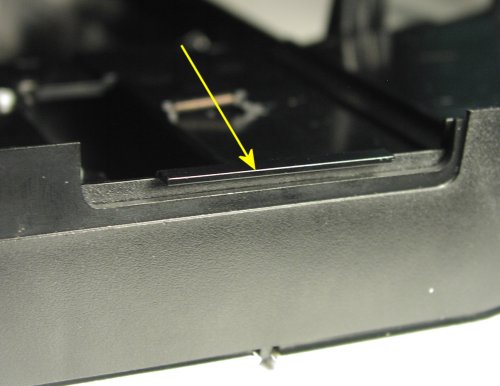
Mini Memory
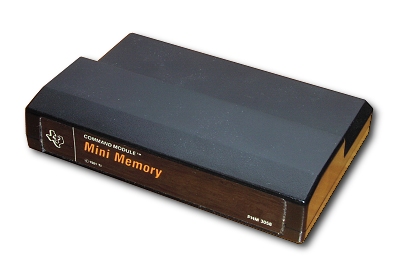
The Mini-Memory Cartridge is a neat device that allows one to actually store small programs in the cartridge. It also comes with an assembly editor, which os how a lot of TI-99/4A users first worked with assembly language.
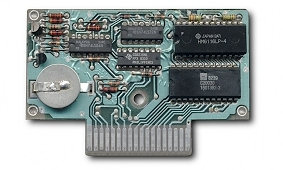
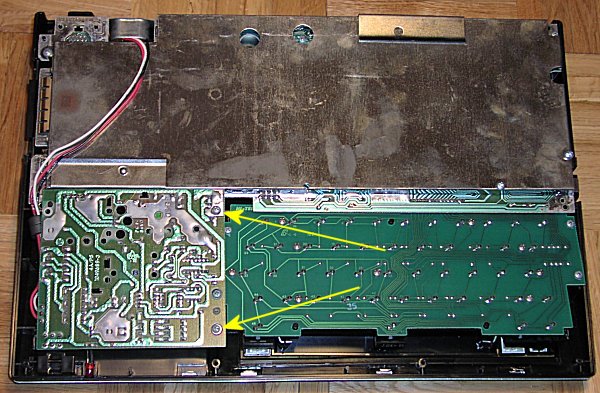
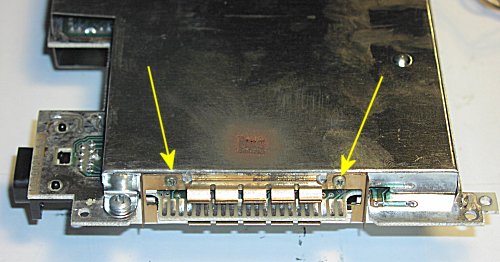
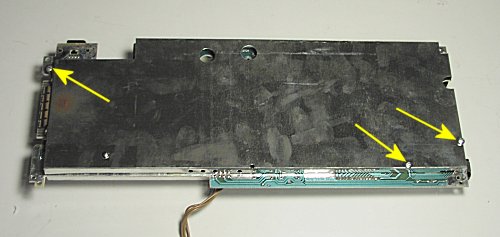
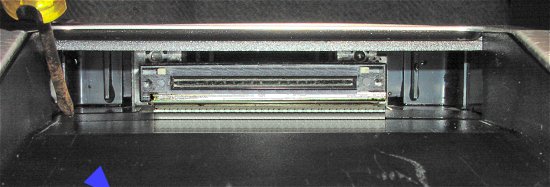
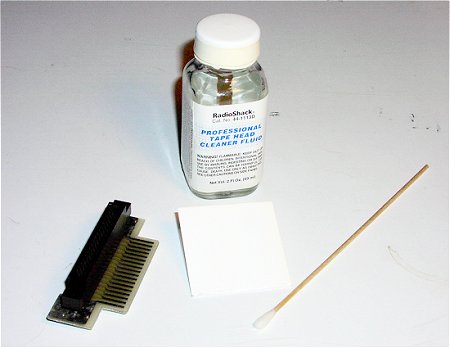
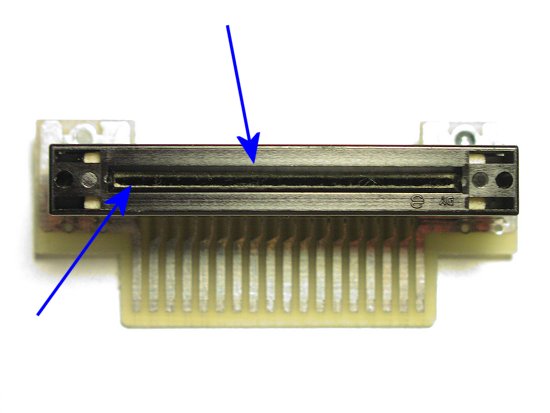
This is the “insides” of the Mini-Memory Cartridge. Notice the battery which kept a small charge on the memory chips so it could keep programs even after it was removed from the computer. If you pick one of these up, you will most likely have to change this battery. Here is a link to the instructions for doing just that: http://www.mainbyte.com/ti99/minimem/minimem.html
By Ira McComic
You know looks can be deceiving. For example, who would ever suspect that a bespectacled, mild-mannered reporter for the Daily Planet could actually hop over a skyscraper with a single bound? In the same way, there’s a lot more to TI’s new Mini Memory Command Module than meets the eye. It appears to be just a normal, garden-variety Command Module*the same size, same shape, the same black unassuming case. But lying inside that plain cover are the ingredients to convert your TI Home Computer from a good BASlC programming machine into a trim and efficient assembly language instrument.
The name itself is a clever disguise. “Mini” Memory, indeed! If you believe that all there is inside that plastic case is just a little bit of memory, then you’d probably believe the Trojan Horse was nothing more than an overgrown child’s riding toy! There’s actually 14K bytes of memory sitting in there. 4K bytes of RAM, 4K bytes of ROM, and 6K bytes of GROM.
RAM (read/write) memory is the kind of memory in which our programs are stored. You know how it works. You write a program and it’s stored in RAM. When you turn off the computer, the program you wrote is gone, unless you had the foresight to save it on a cassette or diskette before you flipped the switch on the computer. Now, here’s the first surprise from the Mini Memory Module: You can store a program or data in its RAM and your program or data is not lost when you turn off the computer. In fact, you can store a program or data in the Mini Memory Module’s RAM, turn off the computer, remove the module from the console and carry it around with you, just as you can a cassette or diskette. This seeming miracle is possible because the module contains its own life-support system. A battery inside the module keeps the contents of the RAM alive. The RAM components are CMOS devices and are power misers. It only takes a small trickle of current to keep the little critters alive when they are not being used. The battery inside the module should last you a couple of years. When you finally need a new battery, you can exchange the module for a new one.
Battery-backed RAM can be real handy, if you think about it. Just imagine*you can write a new program, store it in the Mini Memory Module, turn off the computer, yank out the module, zip over to your friend’s house where you plug in the Mini Memory Module, and instantly load your new program into your friend’s computer so he can admire your handiwork. No cassettes, no disks, no messy cables, and no long waits.
Besides the battery-backed RAM, the Mini Memory Module also has 6K bytes of GROM (Graphics Read Only Memory) and 4K bytes of ROM (Read Only Memory). Inside the GROM and ROM are seven additional TI BASIC subprograms, including PEEK and POKE.
This same GROM and ROM also gives you access to many of the computer system’s routines from assembly language programs. There’s still more. As you develop your assembly language programs, you’ve got some help. The ROM contains a powerful program debugger called EASY BUG which you can use to exterminate those pesky �logic vermin� which sometimes infest programs.
At this point, you may be saying to yourself, “What good does all this assembly language access and debugging stuff do me, anyway, without an assembler?” Glad you asked. Here’s the next bit of exciting news. The Mini Memory Command Module comes with a cassette which contains an assembler. You can load this assembler into memory, enter assembly language statements, and have the assembler translate the statements into 9900 object code for you.
See what I mean? There’s a lot more to this Mini Memory Module than its alliterative name. . . The Mini Memory Module is, indeed, full of pleasant surprises. Here’s what we’ve discovered so far: First, it’s got 4K bytes of battery-backed RAM where we can save programs and data. Secondly, it’s got 10K bytes of ROM and GROM which contain additional TI BASIC subprograms, provide a passport into the computer system’s routines, and hold the EASY BUG debugger. Thirdly, the Mini Memory Module comes with an assembler so you can create your own assembly language programs. That ought to be enough to even coax a smile out of a mother-in-law, but there is still one more surprise: On the same cassette with the assembler is a bonus. It’s a demonstration program which produces a fascinating color burst of patterns on the monitor or TV display.
Let’s explore these items one at a time.
FILE STORAGE
Probably most persons will use the Mini Memory Module most often for temporary storage of programs and data. You can think of the Mini Memory Module as a very fast access storage device.
Additional Files
When you have the Mini Memory Command Module plugged in, the 4K-byte RAM has the file name MINIMEM for TI BASIC program and data storage. The RAM occupies physical addresses 28672 through 32767 (hexadecimal 7000 through hexadecimal 7FFF). You can save programs in this file and load programs from it. (For example, to save a TI BASIC program, just enter the command SAVE MINIMEM.) You can also store data in this file using the file specifications available for any TI BASIC file. For example, the following statements open the Mini Memory file and store four data values in the file.
OPEN #3 :”MINIMEM”,RELATIVE,FIXED,UPDATE
INTERNAL
PRINT #3: A,B,C,D
With the Mini Memory Module you can also access a second new file. EXPMEM2 is the name of a 24K-byte memory file located in the 32K Memory Expansion unit. EXPMEM2 is only available, however, if you have the Memory Expansion unit connected to your computer and turned on.
ROM AND GROM PROGRAMS
Inside the Mini Memory Command Module’s 10K bytes of “firmware” (that’s computer talk for ROM and GROM) are additional TI BASIC subprograms, hooks to connect assembly language programs to the computer system’s programs, and a program debugger for machine language programs.
Additional TI BASIC Subprograms
Seven additional TI BASIC subprograms are yours with the Mini Memory Module. These subprograms are PEEK, PEEKV, POKEY, CHARPAT, INIT, LOAD, and LINK.
The PEEK subprogram reads bytes of CPU RAM data and copies the data directly into TI BASIC variables. For example, the statement:
CALL PEEK (8192,A,B,C(8))
reads three bytes of data from address 8192 and up, and assigns the values read to the variables A, B, and C(8).
The PEEKV subprogram reads bytes from VD1� RAM. It works exactly like PEEK, except PEEKV accesses VDP RAM instead of CPU RAM.
The POKEy subprogram stores data values into VDP RAM. For example, CALL POKEV(784,30,30,30) writes the value 30 to VDP RAM locations 784, 785, and 786.
The CHARPAT subprogram reads a 16-character pattern identifier that specifies the pattern of a character code. For example, CALL CHARPAT(68,D$) places the pattern defining character code 68 in the string variable D$.
The three TI BASIC subprograms INIT, LOAD, and LINK interface assembly language programs and TI BASIC programs.
The INIT subprogram initializes the CPU memory for assembly language programs. The LOAD subprogram serves two purposes: it loads assembly language object files into CPU memory; and it loads data into CPU memory.
There are two forms of the LOAD subprogram. One form is used to load an object file from a storage device into memory and the second form is used to load data directly into CPU memory. For example, the statement CALL LOAD (“DSK1. DEMO”) loads the file DEMO from the diskette in Disk Drive 1.
The second form of the LOAD subprogram is a POKE function for CPU RAM. For example, the statement CALL LOAD (8197,85,40) loads the value 85 into memory location 8197 and the value 40 into memory location 8198.
The LINK subprogram passes control and, optionally, a list of parameters from a TI BASIC program to an assembly language program. For example, the statement CALL LINK (“PROG1”,A,E(9)) passes control from a TI BASIC program to an assembly language program named PROG 1 and passes the variables A and E(9) to the program.
Access to System Routines
The utility routines resident in the Mini Memory Command Module can be called from an assembly language program to access machine resources and interface with the TI BASIC interpreter. It’s fair to warn you that the use of these routines requires a knowledge of the routines themselves and the organization of data used by the routines. You can get additional information about these routines from the Editor/Assembler owner’s manual, (This is an excellent book, by the way. It’s packed with inside information on the Home Computer’s architecture.)
Two types of access programs are resident in the Mini Memory Command Module. One program contains a collection of system utilities with which to link to ROM/GROM routines, perform a keyboard scan, access the VDP, etc. The individual utility programs are classified as either a “Standard Utility” program or an “Extended Utility” program.
A second program contains TI BASIC interface utilities with which an assembly language program can access variables passed through a CALL LINK statement in a TI BASIC program. This program also contains an error-handling utility to return exceptions to a TI BASIC program.
Standard Utility Programs
Here’s a list of the standard system utilities which become accessible with the Mini Memory Command Module.
* VDP Single Byte Write * write a single-byte value to a specified VDP RAM address.
* VDP Multiple Byte Write * write multiple bytes from CPU RAM to VDP RAM.
* VDP Single Byte Read * read a single byte from a specified VDP RAM address.
* VDP Multiple Byte Read * read multiple bytes from VDP RAM into CPU RAM.
* VDP Write to Register * write a single-byte value to any of the VDP RAM registers.
* Keyboard Scan * scan the keyboard and return a keycode and status. This routine can also read the position of the Wired Remote Controller.
Extended Utility Programs Extended utilities are provided to access routines in the console CROMs and ROMs. These utilities are GPLLNK (link to GPL routines in GROM), XMLLNK (link to routines in ROM), and DSRLNK (link to Device Service Routines). The Mini Memory Module manual (try to say that three times real fast) advises that you ought to know what you’re doing before you access these routines.
GPLLNK Routines The GPLLNK routines are as follows:
* Load Standard Character Set * load the standard character set into VDP RAM.
* Load Small Character Set * Loads the small character set (for the 40-column “Text Mode”) into VDP RAM.
* Execute Power-Up Routine * Initializes the system as if the computer had just been turned on.
* Accept Tone * Issues an accepting tone for input.
* Bad Response Tone * Issues a bad-response tone warning.
* Bit Reversal Routine * Provides a mirror image of a byte of information. (This is often handy to form a mirror image of a character definition.)
* Cassette Device Service Routine * Accesses a cassette tape recorder/player as a storage device.
* Load Lower Case Character Set * Loads the lower-case character set into VDP RAM.
A number of floating point routines are also available through GPLLNK. Here they are:
* Convert a floating-point number to an ASCII string.
* Compute the greatest integer contained in a value. * Raise a number to a specified power.
* Compute the square root of a number.
* Compute the inverse natural logarithm of a value.
* Compute the natural lo~ of a number.
* Compute the cosine of a number.
* Compute the sine of a number.
* Compute the tangent of a number.
* Compute the arctangent of a number.
XMLLNK Routines
Routines in the console ROM can be accessed through the XMLLNK routine. The following routines can be called from an assembly language program using XMLLNK.
* Floating-point addition.
* Floating-point subtraction.
* Floating-point multiplication
* Floating-point division.
* Floating-point compare.
* Floating-point stack addition.
* Floating-point stack subtraction.
* Floating-point stack multiplication.
* Floating-point stack division.
* Floating-point stack compare.
* Convert a string to a number.
* Convert a floating-point format number to integer.
* Push a value onto the value stack.
* Pop a value from the value stack.
* Convert an integer number to floating-point format.
DSRLNK Routines
DSRLNK links an assembly language program to a Device Service Routine (DSR) or subprogram in ROM. As with GPLLNK and XMLLNK, TI cautions you to make sure you know what you are doing before using DSRLNK.
A DSR is a machine language program that TI has burned into ROMs found in each of its peripherals. Since each peripheral contains its own custom “operating system,” the TI-99/4 did not have to be designed to anticipate future peripheral requirements*Ed .1
TI BASIC Interface Utilities TI BASIC interface utilities allow an assembly language program to read or assign values to variables passed in a parameter list from a CALL LINK statement in a TI BASIC program. These utility routines include argument-passing utilities and an error-reporting utility.
The following are the TI BASIC interface utilities.
* Assign a numeric value to a numeric variable.
* Assign a string to a string variable.
* Retrieve the value of a numeric parameter.
* Retrieve the value of a string parameter.
* Report an error. (The assembly language program can report any existing TI BASIC error or warning message upon returning to TI BASIC.
EASY BUG Debugger
Also inside the Mini Memory Module’s ROM is EASY BUG. EASY BUG is a versatile program development tool with which you can (1) debug your assembly language programs, (2) access the input/output ports of the computer, (3) load programs, and (4) store programs. And, as the name implies, it really is easy to use. -With EASY BUG, you can inspect and (optionally) modify the contents of CPU and VDP memory, display the contents of ROM, run assembly language programs from EASY BUG, directly access the peripheral devices which are connected to the computer via the 9900 microprocessor’s serial I/O port (the CRU), and save and. load programs on cassette.
LINE-BY-LINE SYMBOLIC ASSEMBLER
A line-by-line symbolic assembler on a cassette tape is supplied with the Mini Memory Module. It assembles assembly language statements and stores the object code directly into the 99/4�s CPU RAM. The assembler is a derivative of the line-by-line assembler used by the TM990/189 board (the University Module). You can make both forward and backward references to one- or two-character labels with the assembler. Each source statement you enter is immediately assembled into object code and stored into memory. Some source code is retained in a nine-page text buffer. You can scroll the screen to review previously entered lines of source code by pressing the Up- and down-arrow keys. The source program cannot be saved, however.
The line-by-line assembler occupies about 2K bytes. When it is loaded into the Mini Memory Module’s 4K byte RAM, you still have about 2K bytes of memory for your assembly language program.
Assembler Directives
The assembler recognizes seven directives:
* The AORG (Absolute Origin) directive establishes the location counter value to set the starting address of the assembled code.
* The BSS (Block Starting with Symbol) directive re- serves a block of memory without initializing the space.
* The DATA (Data Initialization) directive initializes a word or words of memory to a specific value.
* The END (End Program) directive terminates the assembler and causes a display of the number of unresolved references, if any.
* The EQU (Equate) directive defines a value for a symbolic constant.
* The SYM (Symbol Table Display) causes a display of all symbols and theft associated values in the program.
* The TEXT (String Definition) directive causes a string of characters to be translated into their ASCII code and stored as a part of a program.
[An assembler “directive” is a programming-aid command which directs the assembler to perform certain operations at assembly time. An assembler may execute many “instructions” (telling the microprocessor to perform single functions such as Add or Move) to satisfy one directive*Ed.]
DEMONSTRATION PROGRAM
Along with the line-by-line assembler on the cassette is an assembly language demonstration program called LINES which draws a colorful line design on the screen. The LINES program can be run only on the TI-99/4A Home Computer, however, because it requires the enhanced graphics processor contained in the TI-99/4A. [A forthcoming issue will carry an explanation of how the “bit map” mode (necessary for the LINES program) of the TMS99 WA Video Display Processor works*Ed
OPERATION
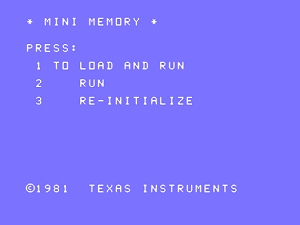
TI has a knack for creating complex and versatile programs that are still simple to operate; they’ve definitely done it again with the Mini Memory Module. When you plug in the module, turn on the computer, and pass the opening credits on the Master Title Screen, you are presented with a simple, three-choice selection screen. You can choose TI BASIC, EASY BUG, or MINI MEMORY.
If you select MINI MEMORY, you are presented with a second three-choice selection screen. You can choose to load an object program into memory and run it, run a previously loaded program already in memory, or re-initialize the module to prepare it for loading new programs or storing data, Pick a number, pluck a key and you’re off and running. It’s as easy as eating oatmeal cookies!
CONCLUSION
This has got to be one of the best deals around. There’s 4K bytes of RAM with battery backup so that all the good stuff stored in the RAM is not lost when you turn off the console or even when you remove the module. There’s 1OX bytes of ROM and GROM which give you seven additional TI BASIC subprograms (including PEEK and POKE), access to system routines from assembly language, and routines to allow you to interface assembly language programs to TI BASIC. You’ve got a user-friendly program debugger, a symbolic line-by-line assembler, and a captivating graphics demonstration program. All of this, plus S4 pages of docomentation for $99.95 (suggested retail price). With all this to offer, it’s really not too hard to see why there’s definitely more to the Mini Memory Command Module than meets the T-eye…


")


